2.574-012.0
0.084-158.0 (08/24)
0.084-158.0 (08/24)
Material damage through incorrect installation
Allow only qualified staff to perform the installation.Be sure also to observe the operating instructions and safety instructions of the unit in which the attachment kit is installed.
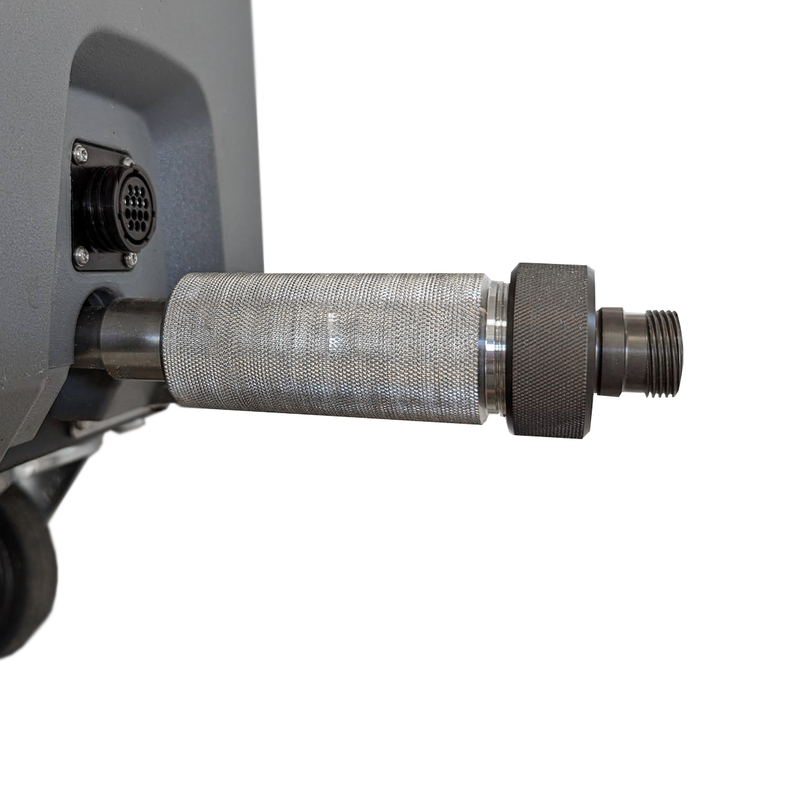
The Scrambler attachment kit crushes dry ice pellets to blast sensitive and soft surfaces.
The pellets are crushed as they flow through the perforated grids installed in the Scrambler.
The size of the crushed pellets can be adjusted by inserting the perforated grids differently.
The Scrambler is screwed in between the device and the dry ice hose and works purely mechanically.
The Scrambler is suitable for installation in the following devices:
IB L2P
During removal/installation, be sure to follow the information in this manual and in the operating instructions of the device.
The attachment kit is supplied pre-assembled. If the default size set for pellets (1x1 mm) is to be retained, fit the Scrambler to the device as supplied (see chapter “Installing the Scrambler on the device”).
The attachment kit contains the following components:
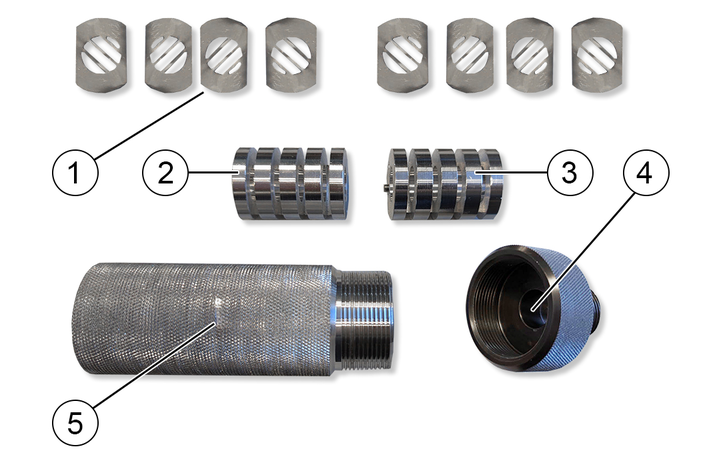
Only use original accessories and original spare parts. They ensure that the appliance will run fault-free and safely.
Information on accessories and spare parts can be found at www.kaercher.com.
Disconnect the dry ice hose from the device.
Disconnect the electrical connection.
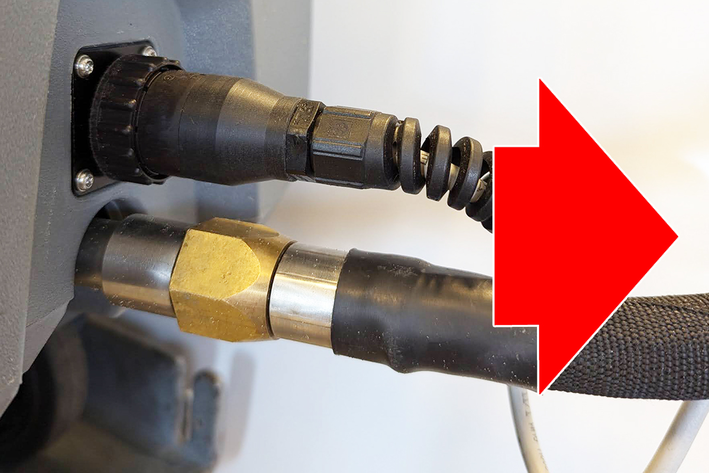
Screw the Scrambler onto the connection of the dry ice hose and hand-tighten.
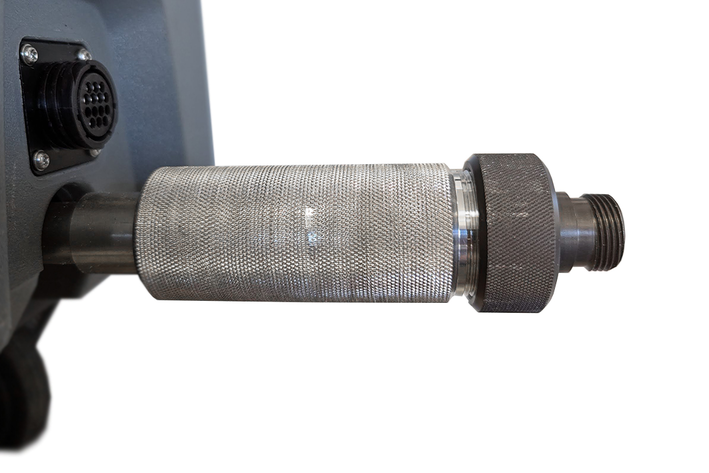
Screw the dry ice hose onto the Scrambler.
Establish the electrical connection.
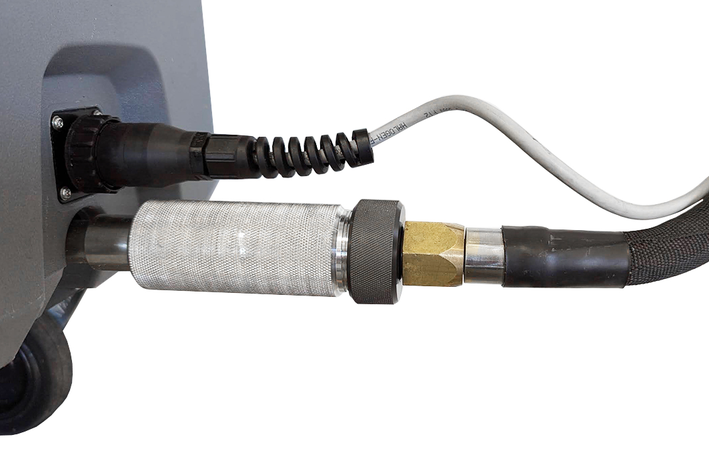
Start up the device and check whether the pellet size has been selected correctly.
The installation is now complete. If the pellet size is not suitable for the planned use, set the size as follows.
Risk of injury due to cold surfaces
Cold device parts can cause skin burns
Before removing the Scrambler, allow the device to warm up sufficientlyRemove the Scrambler.
Unscrew the casing cover.
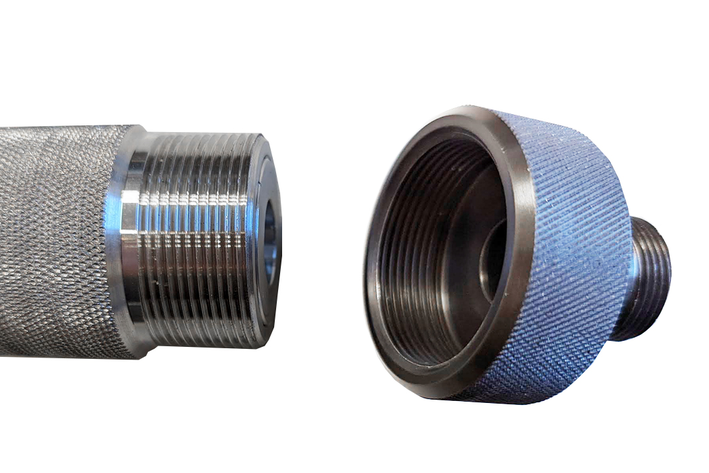
Remove both mounting sleeves for the perforated grids from the casing.
Take out the perforated grids and rearrange them.
The arrangement of the perforated grids determines the pellet size. The following combinations are possible:
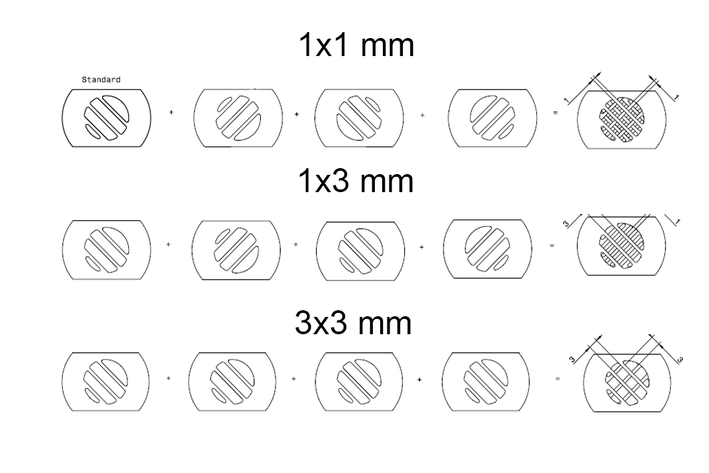
Insert the perforated grids into the mounting sleeves in the desired order.
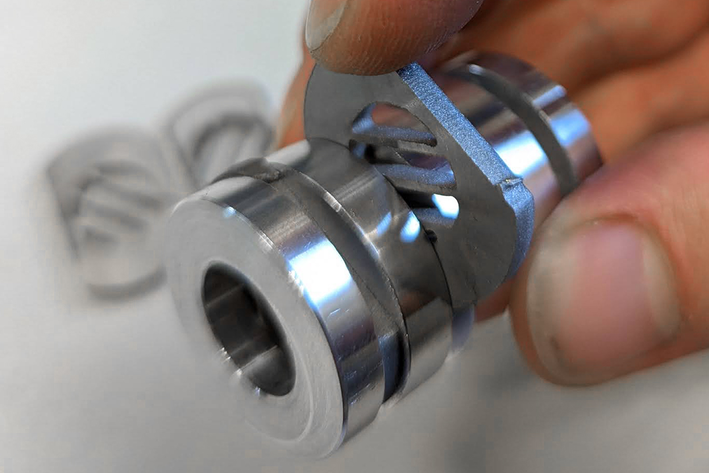
When inserting, make sure that the perforated grids are flush with the mounting sleeve at the round area.
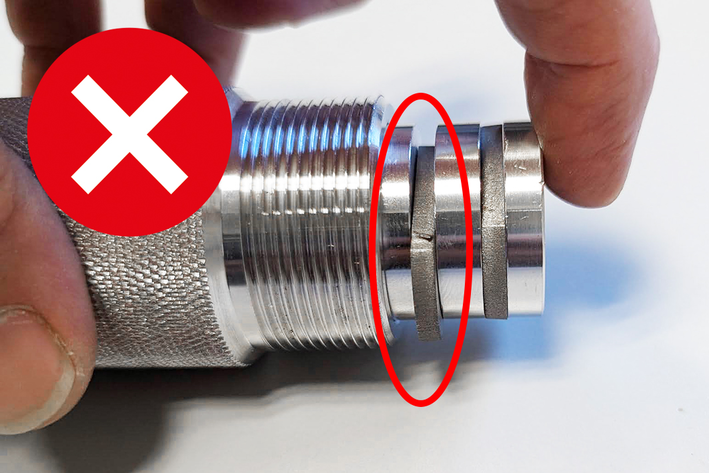
All 8 perforated grids must always be inserted to avoid malfunctions.
Once all the perforated grids have been inserted, insert the mounting sleeves into the casing.
The mounting sleeves are equipped with an assembly aid.
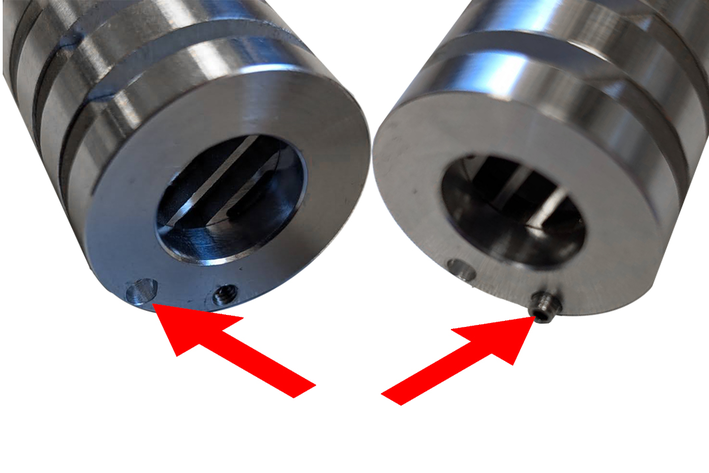
The two mounting sleeves are rotated by 45° in relation to each other. To ensure this, one mounting sleeve has a glued-in grub screw and the other has a drilled hole. When these are inserted into one another, the sleeves are correctly aligned.
First insert the mounting sleeve with the hole into the casing.
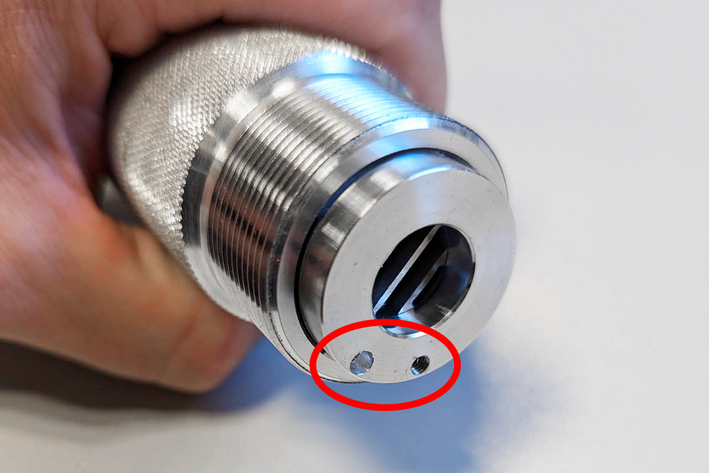
Then insert the other mounting sleeve into the casing. When doing so, insert the grub screw into the hole.
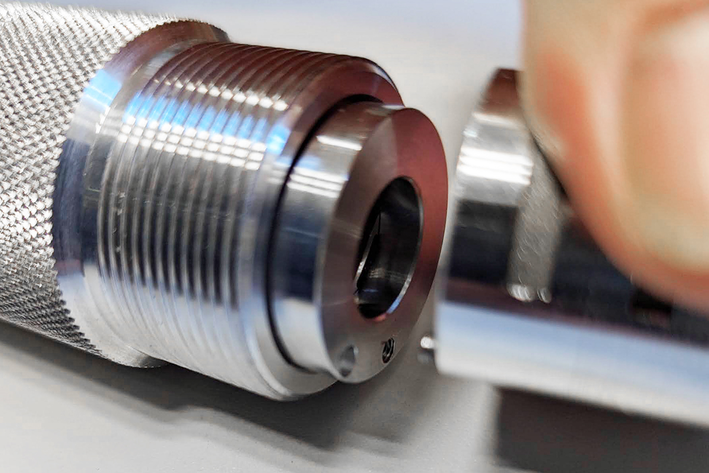
If the mounting sleeves are installed correctly, the surface of the sleeve is flat with the edge of the casing.
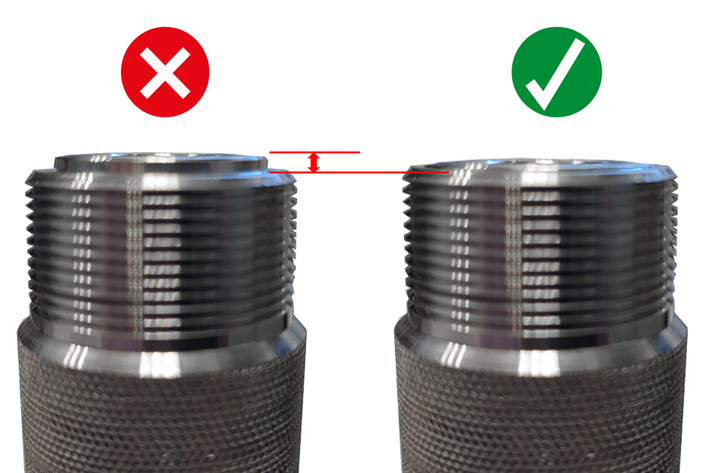
Once the mounting sleeves are correctly inserted, screw the casing cover back on.
Install the Scrambler on the device (see chapter “Installing the Scrambler on the device”)